How to E-Verify ITR Through Net Banking

Introduction
Its income tax retun filing season. Once you’re done with the e-filing process, the next step is to verify the ITR to make it valid and acceptable to the Income Tax Department. One of the most convenient methods to e-verify your ITR after you file an income tax return is through net banking. If you go for the net banking e-verification method, then you can save a lot of time and effort. In this article, we’ll guide you through the simple steps to e-verify your ITR using net banking.
Step-by-Step Guide to E-Verify ITR Through Net Banking
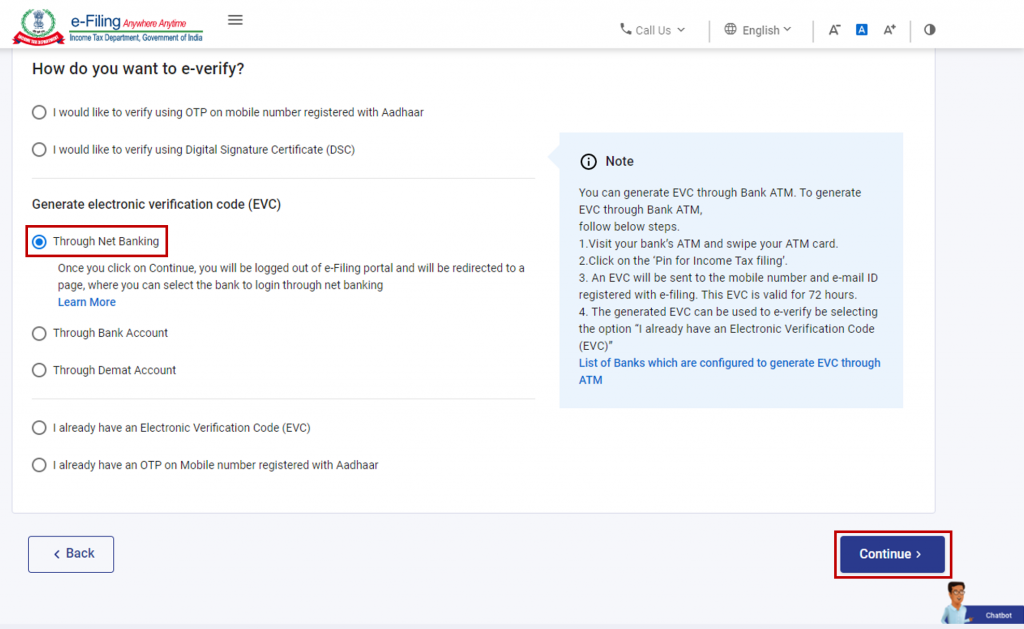
Step 1: Choose ‘Net Banking’ on the E-Verify Page
Firstly, you have to file your return on the ITR portal. Once you have successfully filed your ITR on the e-Filing portal, navigate to the e-Verify page. Here, you will find various options for verification such as E-verification via DSC. E-verification via EVC, etc. Choose “Through Net Banking” and then click on “Continue.”
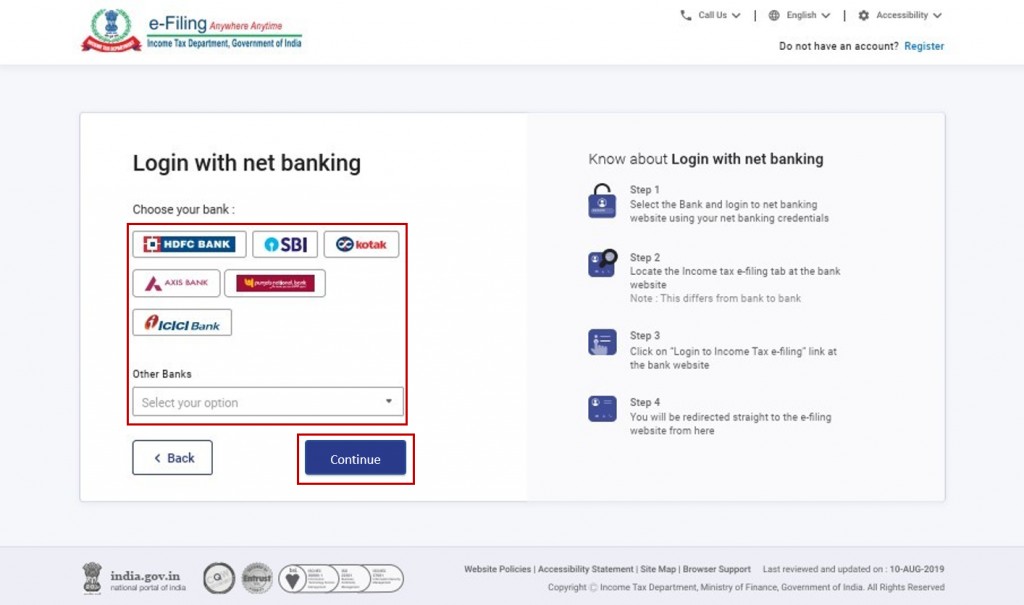
Step 2: Select Your Bank
In this step, you need to select your bank from the list provided. This is the bank through which you want to e-verify your ITR. Click on “Continue” after selecting your bank.
Step 3: Read and Understand the Disclaimer
It’s essential to read and understand the disclaimer provided on this page before proceeding. Once you have gone through it, click on “Continue.”
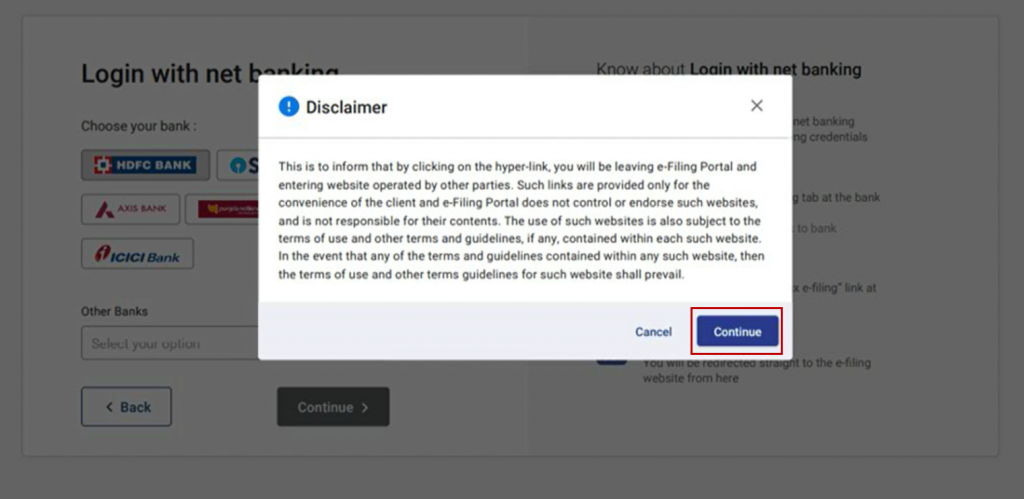
Note: After this step, you will be redirected to the Net Banking login page of your chosen bank.
Step 4: Log in to Your Net Banking Account
Use your Net Banking user ID and password to log in to your account.
Step 5: Access e-Filing from Your Bank’s Website
Look for the link to access e-Filing from your bank’s website and click on it.
Note: You will be logged out of your Net Banking account and automatically logged in to the e-Filing portal.
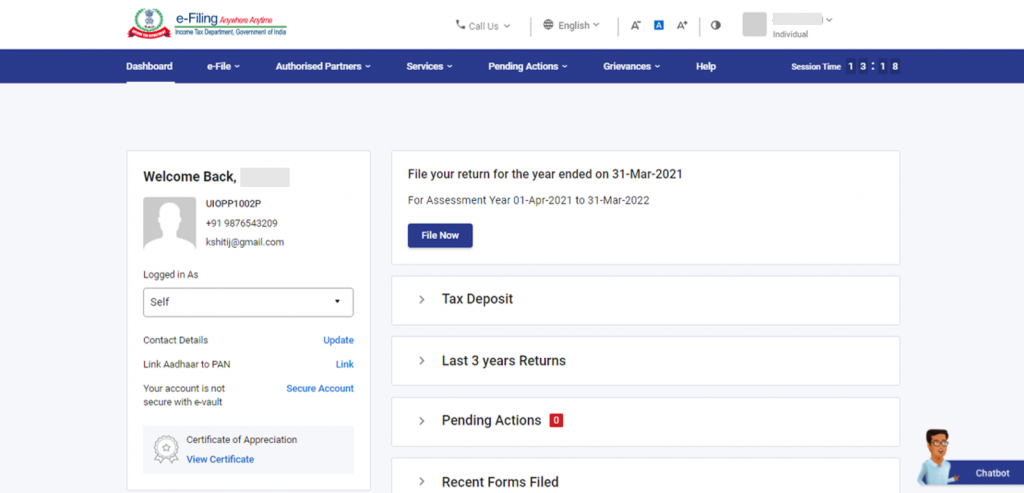
Step 6: Go to the E-Filing Dashboard
After successful login, you will be directed to the e-Filing Dashboard. Locate the respective ITR form that needs to be verified and click on “e-Verify.”
Step 7: Success Message and Transaction ID
After successful e-verification, a success message page will show along with a unique Transaction ID. It is essential to keep a note of this Transaction ID for future reference. Moreover, you will receive a confirmation message on your registered email ID and mobile number on the e-Filing portal.
Conclusion
E-verification of ITR through net banking is a swift and secure method that ensures the validity of your income tax return. Following the simple steps outlined in this article will help you complete the process hassle-free, saving you from unnecessary paperwork and ensuring compliance with tax regulations. E-verify your ITR with ease and stay stress-free during tax season!
Frequently Asked Questions (FAQs)

Monjima Ghosh
Monjima is a lawyer and a professional content writer at LegalWiz.in. She has a keen interest in Legal technology & Legal design, and believes that content makes the world go round.