How to e-verify ITR through Aadhar

Introduction:
After ITR filing, you have to go through the e-verification process. There are various e-verification options. E-verifying ITR through Aadhar is a great option. it is crucial to complete the e-verification process to ensure the validity of your submission. So if you have filed your ITR and are considering e-verification by Aashar, this article is for you. In this comprehensive guide on how to e-verify your ITR using Aadhaar OTP, we will help you through the process step by step.
Method to e-verify ITR through Aadhar by generation OTP
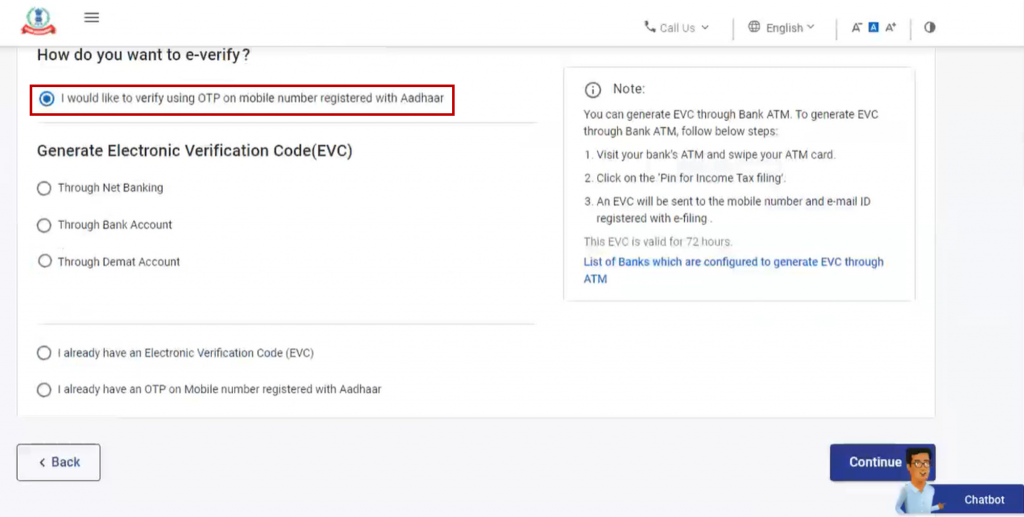
Step 1: Select OTP Verification
Firstly, to e-verify your ITR through Aadhar, go to the e-Verify page on the income tax portal, you will find various options for verification. To proceed with Aadhaar OTP verification, select the option that says, “I would like to verify using OTP on a mobile number registered with Aadhaar.” Click on Continue to proceed to the next step.
Note: You have to be logged in of the ITR page to be able to access the e-verify page.
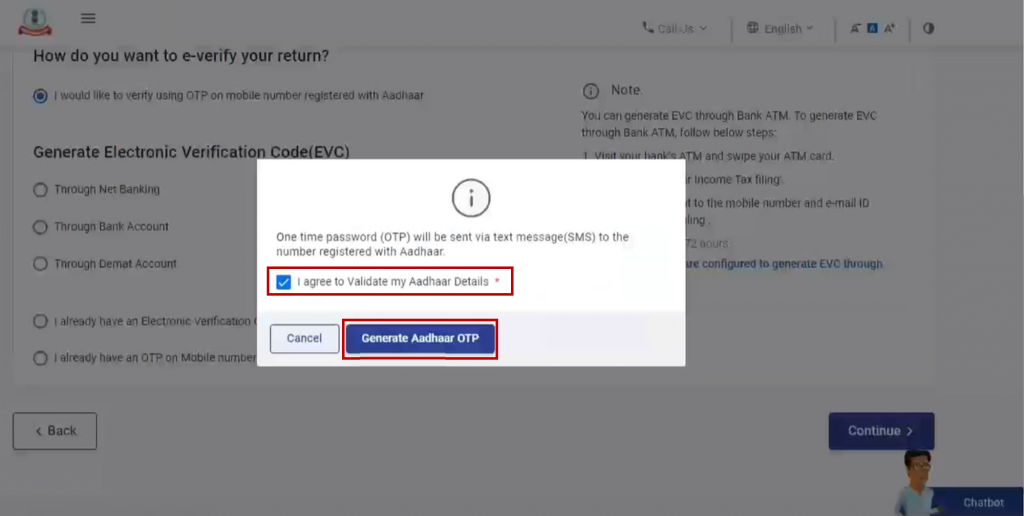
Step 2: Generate Aadhaar OTP
After that, you will be directed to the Aadhaar OTP page. Here, ensure that you agree to validate your Aadhaar details by checking the appropriate checkbox. Then, click on “Generate Aadhaar OTP.”
Step 3: Enter and Validate OTP
Once that’s done, upon clicking the Generate Aadhaar OTP button, you will receive a 6-digit OTP on the mobile number registered with your Aadhaar. Enter this OTP in the designated field and click on “Validate.”
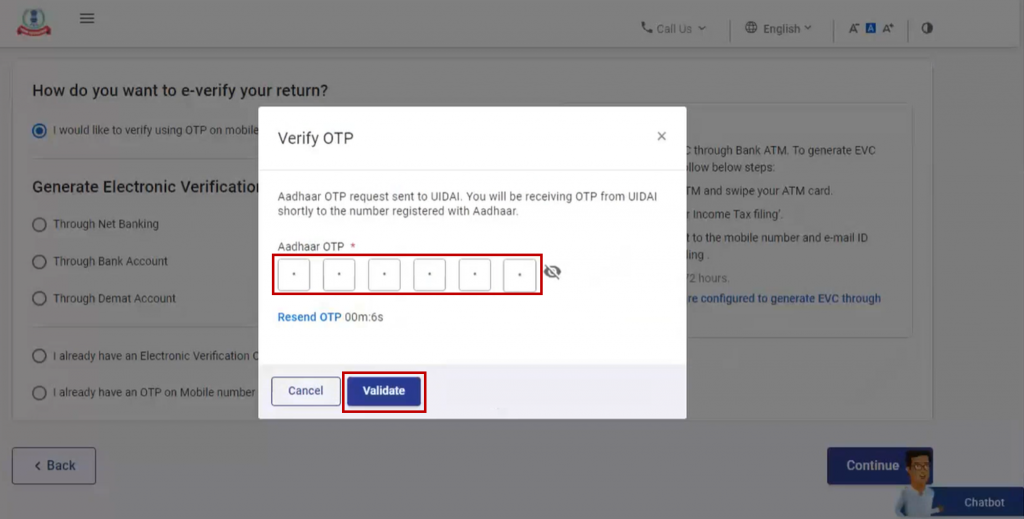
Note: The OTP is valid for 15 minutes only, so ensure you complete the process within that timeframe. If needed, you can click on “Resend OTP” to generate a new one.
Step 4: Confirmation and Transaction ID
Finally, once you have successfully validated the OTP, a success message page will appear, along with a unique Transaction ID. It is advisable to make a note of this Transaction ID for future reference. Additionally, you will receive a confirmation message on your registered email ID and mobile number, indicating the completion of the e-verification process.
Step 5: Verify the Return Status
To ensure that your ITR has been successfully e-verified, you can check the return status on the e-Filing portal. Log in to the portal using your credentials and navigate to the “My Account” section. Under “My Account,” click on “e-Filed Returns/Forms.” You will see the status of your e-verified return displayed as “Successfully e-Verified.”
Step 6: Print Acknowledgement
It is recommended to keep a printed copy of the ITR-V (acknowledgement) for your records. To obtain a copy, log in to the e-Filing portal and select the “View Returns/Forms” option under “My Account.” Choose the relevant assessment year and click on “Acknowledgement Number” for the respective return. This will display the ITR-V in PDF format, which you can download and print.
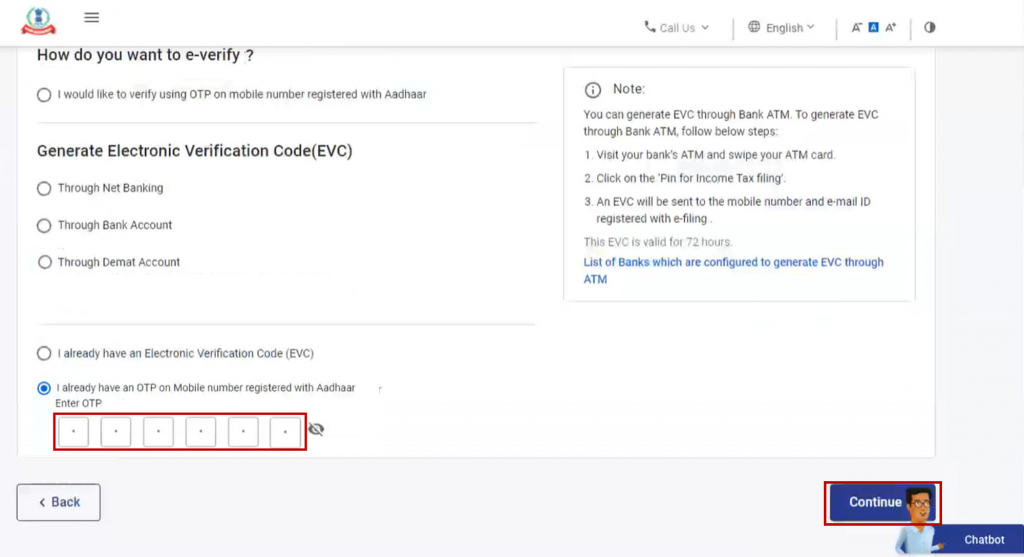
Method to e-verify ITR through Aadharr with existing OTP
Another method to e-verify your ITR using Aadhaar is if you already have an OTP on the mobile number registered with your Aadhaar. Here’s how to do it:
Step 1: Select “I already have an OTP on Mobile number registered with Aadhaar”
On the e-Verify page, select the option that says, “I already have an OTP on Mobile number registered with Aadhaar.”
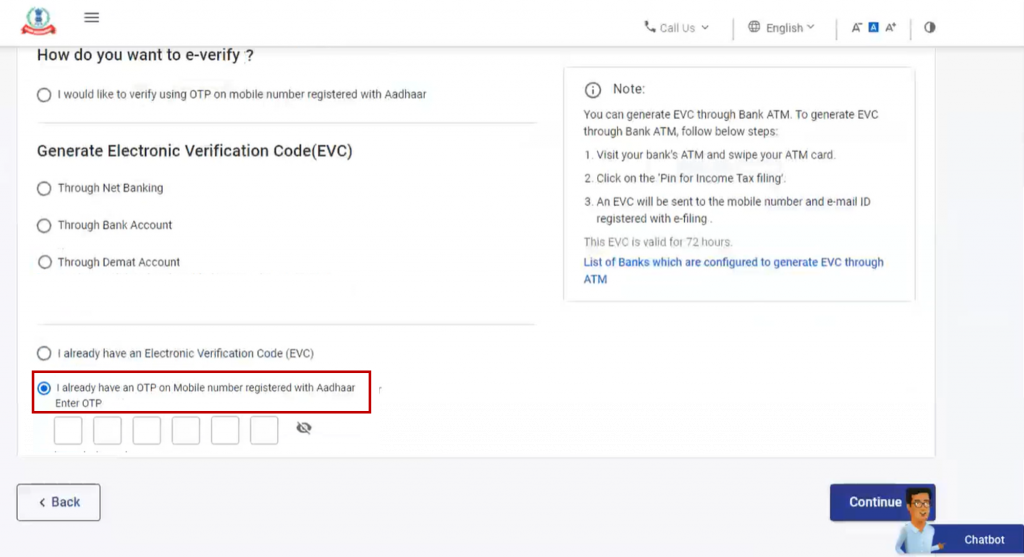
Step 2: Enter the 6-digit OTP available with you and click on “Continue.”
Step 3: Enter and Validate OTP
Upon clicking the Generate Aadhaar OTP button, you will receive a 6-digit OTP on the mobile number registered with your Aadhaar. Enter this OTP in the designated field and click on “Validate.”
Note: The OTP is valid for 15 minutes only, so ensure you complete the process within that timeframe. If needed, you can click on “Resend OTP” to generate a new one.
Step 4: Confirmation and Transaction ID
Once you have successfully validated the OTP, a success message page will appear, along with a unique Transaction ID. It is advisable to make a note of this Transaction ID for future reference. Additionally, you will receive a confirmation message on your registered email ID and mobile number, indicating the completion of the e-verification process.
Step 5: Verify Return Status
To ensure that your ITR has been successfully e-verified, you can check the return status on the e-Filing portal. Log in to the portal using your credentials and navigate to the “My Account” section. Under “My Account,” click on “e-Filed Returns/Forms.” You will see the status of your e-verified return displayed as “Successfully e-Verified.”
Step 6: Print Acknowledgement
It is recommended to keep a printed copy of the ITR-V (acknowledgement) for your records. To obtain a copy, log in to the e-Filing portal and select the “View Returns/Forms” option under “My Account.” Choose the relevant assessment year and click on “Acknowledgement Number” for the respective return. This will display the ITR-V in PDF format, which you can download and print.
Conclusion:
E-Verifying your ITR is a crucial step in completing the income tax filing process. With the convenience and security offered by Aadhaar OTP verification, it has become easier than ever to validate your ITR submission. By following the step-by-step guide for E-Verifying your ITR through Aadhar provided in this article, you can confidently e-Verify your ITR using Aadhaar OTP, ensuring compliance with tax regulations and avoiding any potential issues with your income tax return. Remember to keep a copy of the ITR-V for your records and regularly check the return status on the e-Filing portal to ensure the successful completion of the e-verification process.
Frequently Asked Questions

Monjima Ghosh
Monjima is a lawyer and a professional content writer at LegalWiz.in. She has a keen interest in Legal technology & Legal design, and believes that content makes the world go round.